How to Record a Voice Over in 7 Easy Steps
When it comes to basic video editing skills, voice over recording is undoubtedly one of the most important. Whether you’re a vlogger, videographer, or the creator of real estate videos, learning how to record a voice over can help you enhance the quality and impact of your content. Yet recording a clear, crisp voice over is something that’s often easier said than done.
With the right tools and a bit of preparation, nailing a professional voice over recording is far less complicated than it sounds. Read on to discover our 7 easy tips for mastering the art of voice recording.
1. Use a high-quality microphone
Rule number one of professional voice over recordings is that they need to be clear and easy to understand. For this reason, you’ll need to steer clear of the built-in microphone on your smartphone or laptop. While these are great for everyday purposes like casual video calls, they won’t give you the sound quality you need for a good voice over.
Instead, opt for a USB microphone, which can be plugged into your computer and ready to go in minutes. Many models even come with a mini stand that lets them sit on your desk, ready to be used at a moment’s notice.
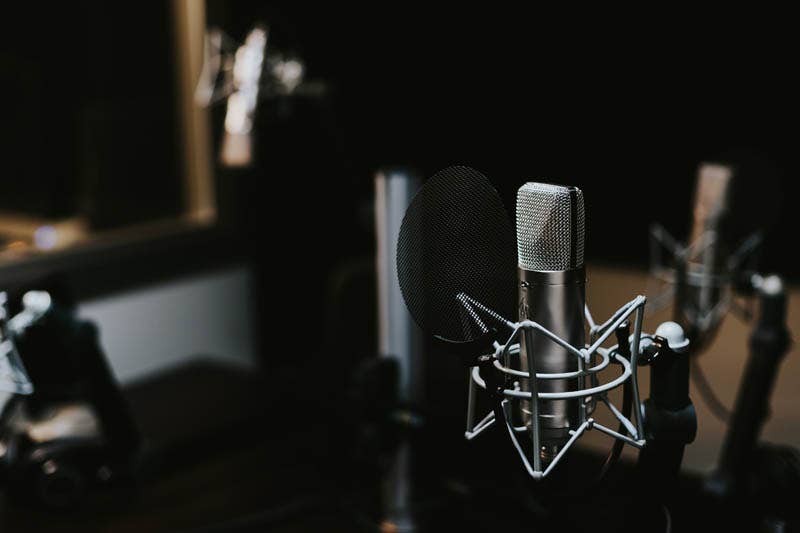
2. Try a microphone pop filter

Pop filters are one of the most simple yet effective home recording studio accessories, and can mean the difference between background noise and silence. They work by eliminating the popping and hissing sounds that can be produced by fast air movements caused by motion, talking, or singing.
While the best mics for podcasting and voice overs usually come with a pop filter, you may need to purchase one separately. If you’re feeling adventurous, you can even make your own pop filter with a coat hanger, pair of nylon tights, and a clamp!
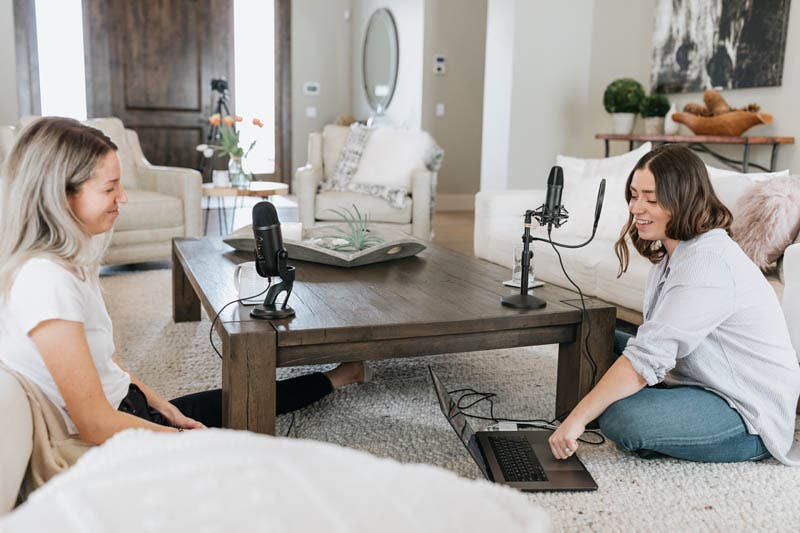
3. Go hands-free
While a handheld microphone can look like the epitome of cool when used by musicians and TV stars, they won’t help you get a good voice over recording. To eliminate handling noises like bumps and rustling, always mount your microphone on a tripod or mic stand.
For best results, position your tripod or stand at a height that allows you to sit or stand comfortably: good posture is essential for clear, perfectly enunciated speech.

4. Listen along

Anyone who has ever recorded audio at home has horror stories of getting what they think is the perfect take, only to play it back and hear distracting background noise at the editing stage. By this point, unfortunately, it’s often too late to do anything but try again.
To prevent this from happening to you, always monitor your audio during recording by using closed-back headphones. As you record, take note of your levels and listen out for distracting background noises and eliminate these wherever possible.
5. Pick a good recording location
Ideally, the best place to take a voice over recording is in a professional studio with sound-proofed rooms. In reality, this is often out of reach for most enthusiasts, particularly those who only need to record a voice over every once in a while.
Thankfully, there are few simple measures you can take if you’re planning to record at home. The best way to record audio at home is by choosing a medium-sized room in a quiet part of the house. Smaller rooms will produce loud echos, while larger spaces can make you sound muffled
Top Tip: Not sure which part of your house works best for recording? Take some test recordings clapping and talking in various locations around your house and compare them.

6. Write a script & stick to it
To avoid annoying “umms” and “ahhs” that you’ll need to remove at the editing stage, write a script that outlines what you intend to say in your voice over. Having a basic idea of the direction of your voice over will help you sound more confident, in turn encouraging your listeners to take what you have to say more seriously.
You don’t need to write out a speech word-for-word, but even a few dot points can help keep you on track and focussed. Do a trial run or two before you press record to iron out any final issues.
7. Learn how to edit audio files
No matter how good a speaker you are, chances are your recording will need a little bit of polishing. To do this, you’ll need to choose a Digital Audio Workstation (DAW) software such as the popular, free program Audacity. Learning how to use Audacity or your chosen software can help take your voice overs from amateurish to expert in no time.
When you record your track, use your DAW software to ensure you’re speaking at a volume that’s clear and easy to understand but not loud enough to lead to audio “clipping” or distortion. After recording, trim your audio down to remove awkward silences or delays. Then, apply a high-pass filter, which removes low frequency background noise such as rumbling or ambient sounds.

Choose the right voice over recording gear today


Master the art of voice recording today
While voice over recordings can seem like a daunting, specialised skill, they’re actually fairly straightforward to master. With the right equipment, knowledge, and a little bit of practice, it’s easy to learn how to record a voice over and get great results from the comfort of your own home.
Sound like something you want to try for yourself? Discover our great range of microphones and audio accessories or visit our blog for more content creation tips now!
Next Post
Christmas in July: 5 Creative Winter Photography Ideas
Previous Post
A Beginner’s Guide to Colour Space