Ted’s Top 5 Tips to Master Composition
So you’ve taken the time to understand how your camera works and watched dozens of online photography tutorials, but you are still not satisfied with how your photos are looking. They just lack that certain spark.
Have you explored the way you compose your photographs? This means how and where you position your subject within the frame.
The understanding of composition will take your photographs from mere happy snaps to masterpieces. Below we have compiled 5 tips to help you master composition and take that vital next step with your photography.
1. Know your subject
First things first, you should know what you want to photograph. By deliberately shooting a particular subject you can make decisions about how your photograph is going to look before you even pick up your camera.
Understanding how your subject is going to behave or appear within the frame will put you in complete control, leaving you free to take advantage of the moment.


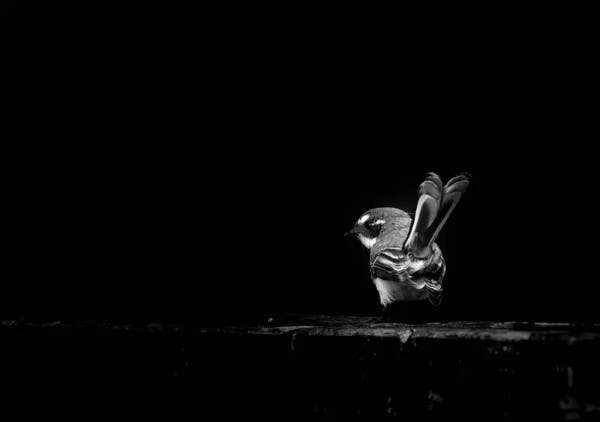
2. Use negative space (don’t overcrop)


One of the main mistakes people make in photography is to overcrop or zoom in too tight. By leaving extra space around the subject you can include more of the context or if you like, add more to the conversation. By shooting wide you can crop it later if you wish, but once you have zoomed and in and taken the shot you cannot add extra details later on.
Another benefit of leaving white or negative space around your subject is it subconsciously draws your viewer’s eye to your subject, resulting in a more impactful photograph. See here if you would like to find out more about negative space photography.
3. Try shooting from a different perspective
A great way to add some interest to your photographs is to try a different perspective. This not only provides you with a different point of view, but it also allows you to control how much space the foreground, midground and background take in your photograph.
Don’t be afraid to look a fool and get down very low to the ground, so you can aim up at your subject. Conversely, try attaining a higher vantage point so you can angle your camera lens down. If you are taking this route, please remember, safety first!


4. Use a shallow depth of field - blur to your advantage


Using the main settings of your camera such as aperture and shutter speed can make a difference to the way your photographs appear, thus helping your compositions.
Depth of Field, influenced by aperture and focal length can be used to make your
subject stand out by blurring the background or can be used to make more of your image in focus, from the foreground until the horizon.
Shutter speed can be used to either freeze moving subjects or emphasize their movement by allowing them to blur – both are great options for creating dynamic images.
By employing these techniques, you can be aware of what areas of your photograph will be sharp or blurry, and position them within your frame to your liking.
5. Understand the rule of thirds and the rule of odds
We can all agree on one thing; rules are made to be broken. Well, the same theory applies to photography, but you have to understand and master the rules first before you can bring out your inner rebel.
Our first rule is the rule of thirds, which refers to placing your subject in the first or second third, or top or bottom third of the image. Placing your subject at these points results in a more visually pleasing image. To understand this approach, use 2 imaginary lines to divide your frame into three parts vertically and horizontally, and at any point where these lines meet, position your subject. Many DSLR and Mirrorless cameras have grid features on the LCD screen to make this step a little easier.


The next rule to follow is the rule of odds. This just means a photograph is easier on the eye if the number of subjects in it is an odd number, such as 1, 3, 5, and so on. Practice both of these rules until they become second nature, and at this point, you can think of little ways to break them to your advantage.
Improve your compositions at home today
Composition is the thing that really makes a photograph your own, so we encourage you to experiment and find your own individual photographic style. If you are looking for more tips to grow your photography from home, follow our Photography Blog.
Next Post
A Beginner's Guide to Basic Camera Settings
Previous Post
Styling Tips for Great Food Photography
